
Breaking Free from Rheem EcoNet: Local HVAC Control with ESPHome and Home Assistant
How I worked around unreliable Rheem EcoNet software using ESPHome-EcoNet, an M5Stack RS485 interface, and local Home Assistant control.
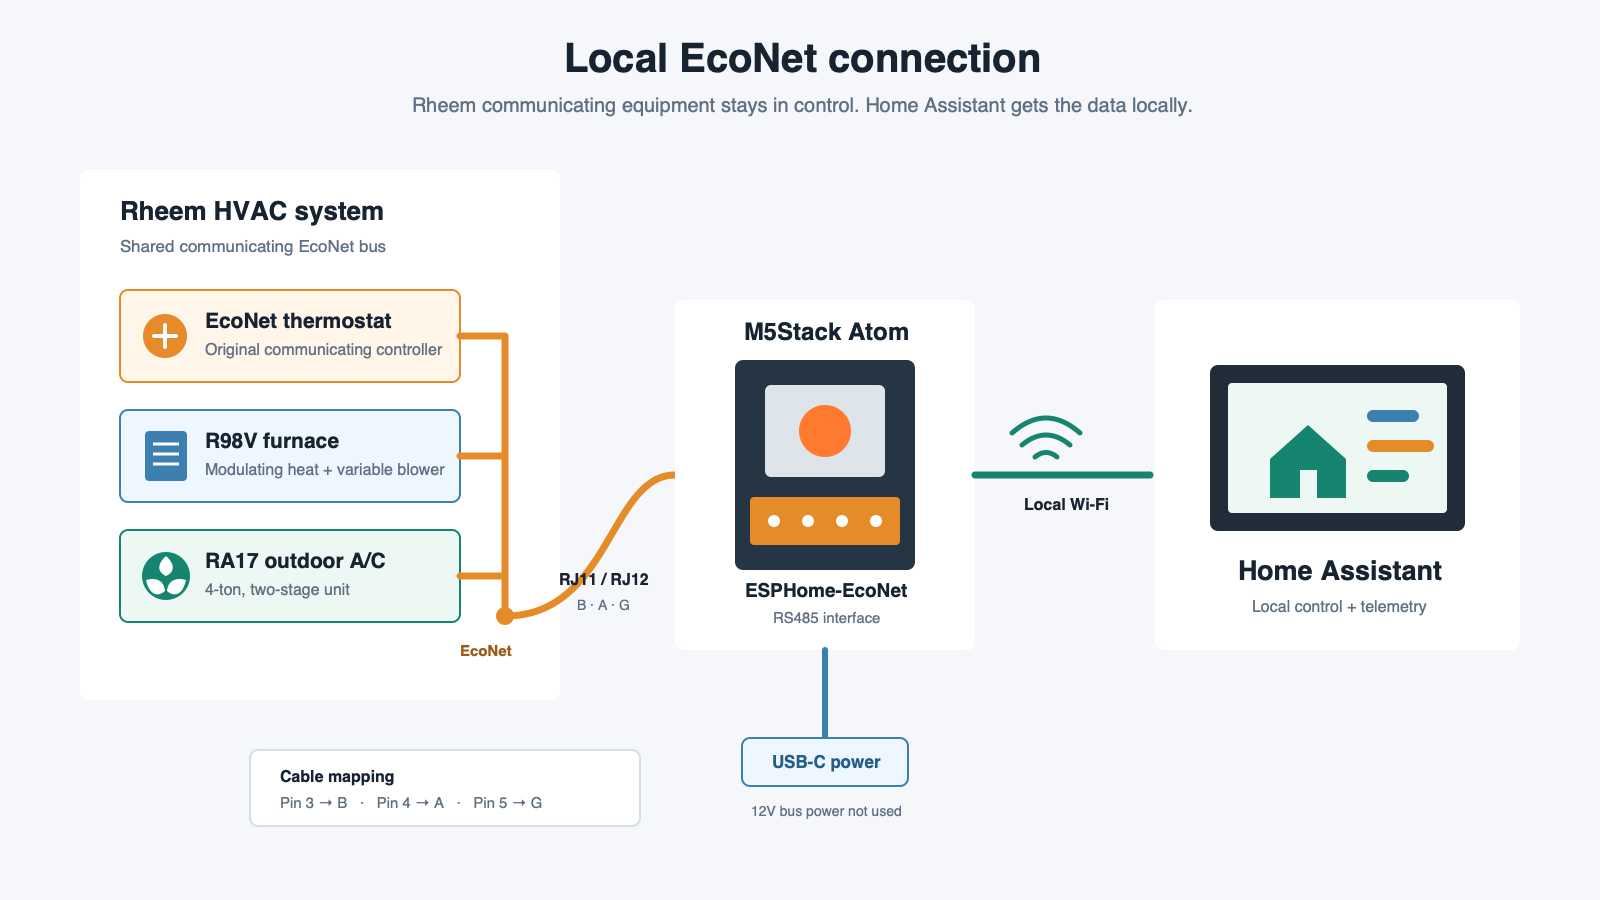
I started looking for a better HVAC integration because Rheem EcoNet with Home Assistant was very buggy. The EcoNet thermostat lost its Wi-Fi connection frequently enough that the integration was practically unusable.
I like the Rheem equipment: a modulating furnace with a variable-speed blower and a two-stage outdoor A/C. I do not like the EcoNet thermostat or its software. Rheem builds sophisticated HVAC hardware, but the software experience does not meet the same standard.
I considered building a local interface myself, then found ESPHome-EcoNet. It connects directly to the EcoNet RS485 bus and gives Home Assistant local access to the furnace, thermostat, and outdoor unit.
My setup
- Rheem R98VB115M524USA modulating gas furnace
- Rheem RA17 4-ton, two-stage communicating A/C
- Rheem EcoNet communicating thermostat
- M5Stack Atom Lite with Atomic RS485 Base (K045 kit)
- ESPHome-EcoNet v3.8.2
- Home Assistant
The K045 kit I used is now end-of-life. The project currently recommends the M5Stack AtomS3 Lite with the ATOMIC RS485 Base. You also need an RJ11/RJ12 cable and a USB-C power supply.
ESPHome-EcoNet appears to have started around Rheem water heaters, with HVAC support added as the project grew. Thank you to its early contributors, including Chester and Joe Stock, and to maintainers and contributors such as tronikos and Josh Barnard. They, along with the broader ESPHome community, saved me from having to build a protocol implementation from scratch.
Installation
- Connect the Atom to a computer with a USB-C data cable.
- Open the ESPHome-EcoNet web installer.
- Select HVAC - Furnace, install the firmware, and configure Wi-Fi.
- Prepare the RJ11/RJ12 cable and connect its verified data conductors to B, A, and G on the RS485 base.
- Connect the cable to the EcoNet communication port with the HVAC power off.
- Power the Atom and add the discovered ESPHome device to Home Assistant.
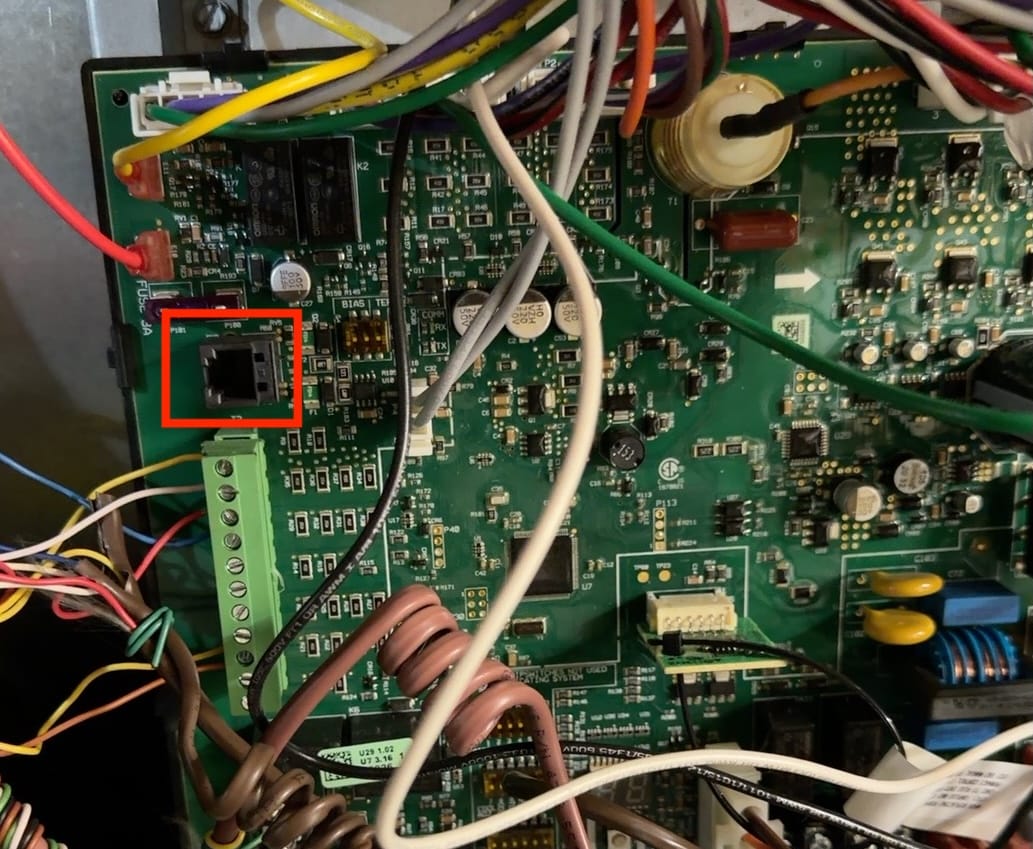
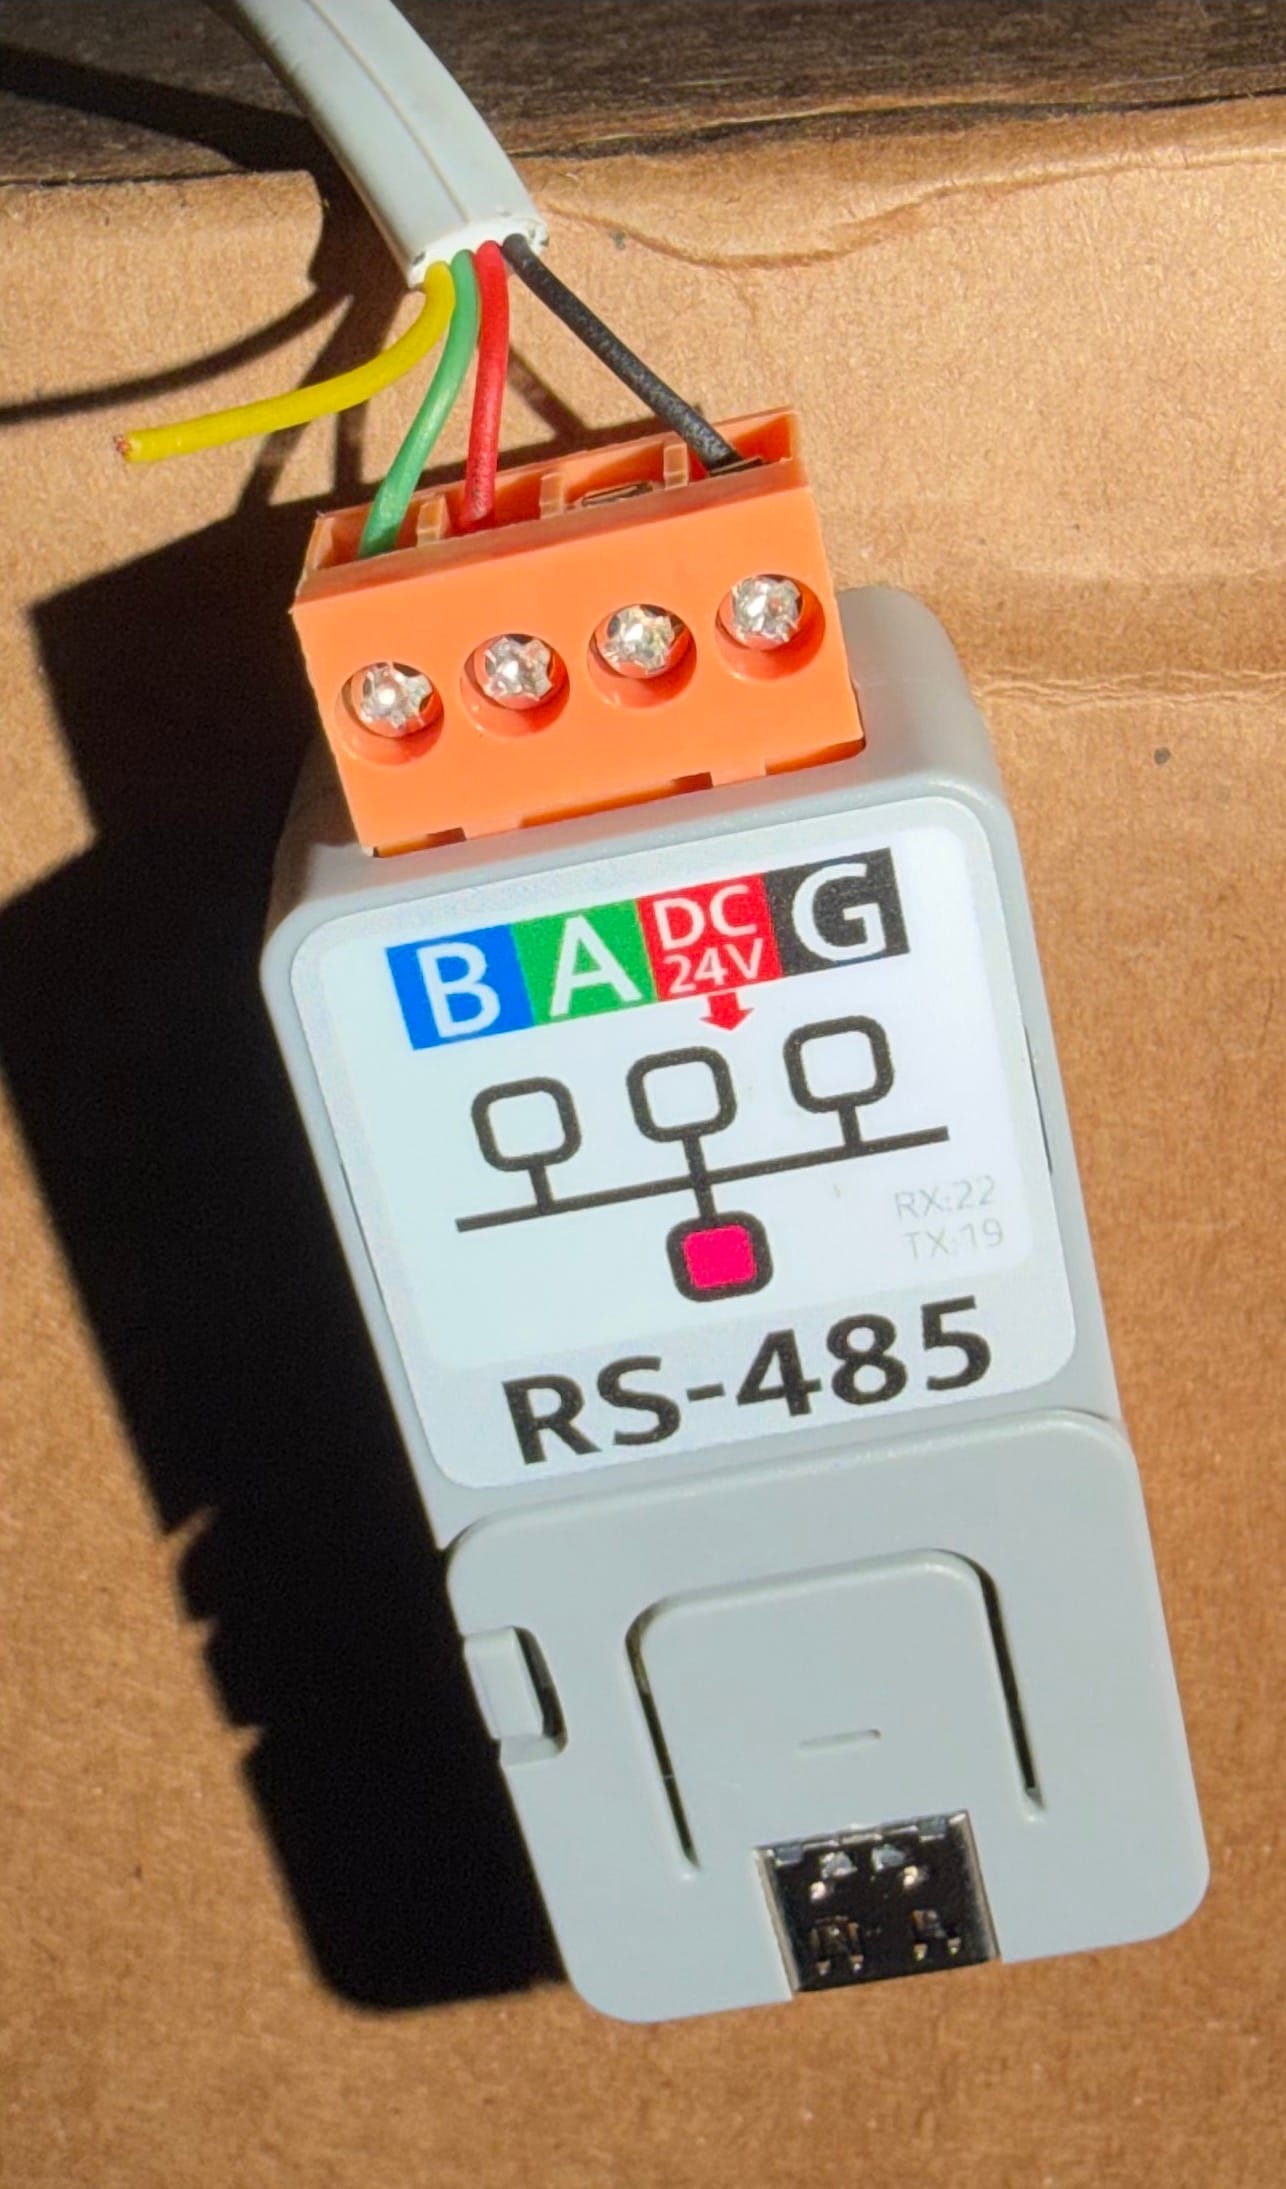
The project wiring guide maps RJ11/RJ12 pin 3 to B, pin 4 to A, and pin 5 to ground. Telephone-cord colors and conductor order can vary, so verify the pins instead of trusting colors. Swapped A and B conductors are a common reason for seeing no data.
I currently power the Atom through USB-C. There is a way to use an additional conductor for equipment power, but I have not implemented or validated that yet. That may be a future update.
Adding the outdoor unit
I first installed from the project's GitHub-hosted web page, then adopted the device into ESPHome Device Builder. The documentation made furnace and ODU support look separate, but both work from the same Atom. I only needed to load both packages:
substitutions:
  name: econet-hvac-furnace
  friendly_name: Rheem HVAC

esp32:
  board: m5stack-atom
  framework:
    type: esp-idf

packages:
  furnace:
    url: https://github.com/esphome-econet/esphome-econet
    ref: main
    file: econet_hvac_furnace.yaml

  outdoor_unit:
    url: https://github.com/esphome-econet/esphome-econet
    ref: main
    file: econet_hvac_odu.yaml

esphome:
  name: ${name}
  name_add_mac_suffix: false
  friendly_name: ${friendly_name}

api:
  encryption:
    key: !secret api_encryption_key

wifi:
  ssid: !secret wifi_ssid
  password: !secret wifi_password
After validating the YAML, I installed the customized build over the network. The furnace package supplies the thermostat and R98V data; the ODU package adds the RA17 telemetry.
The result
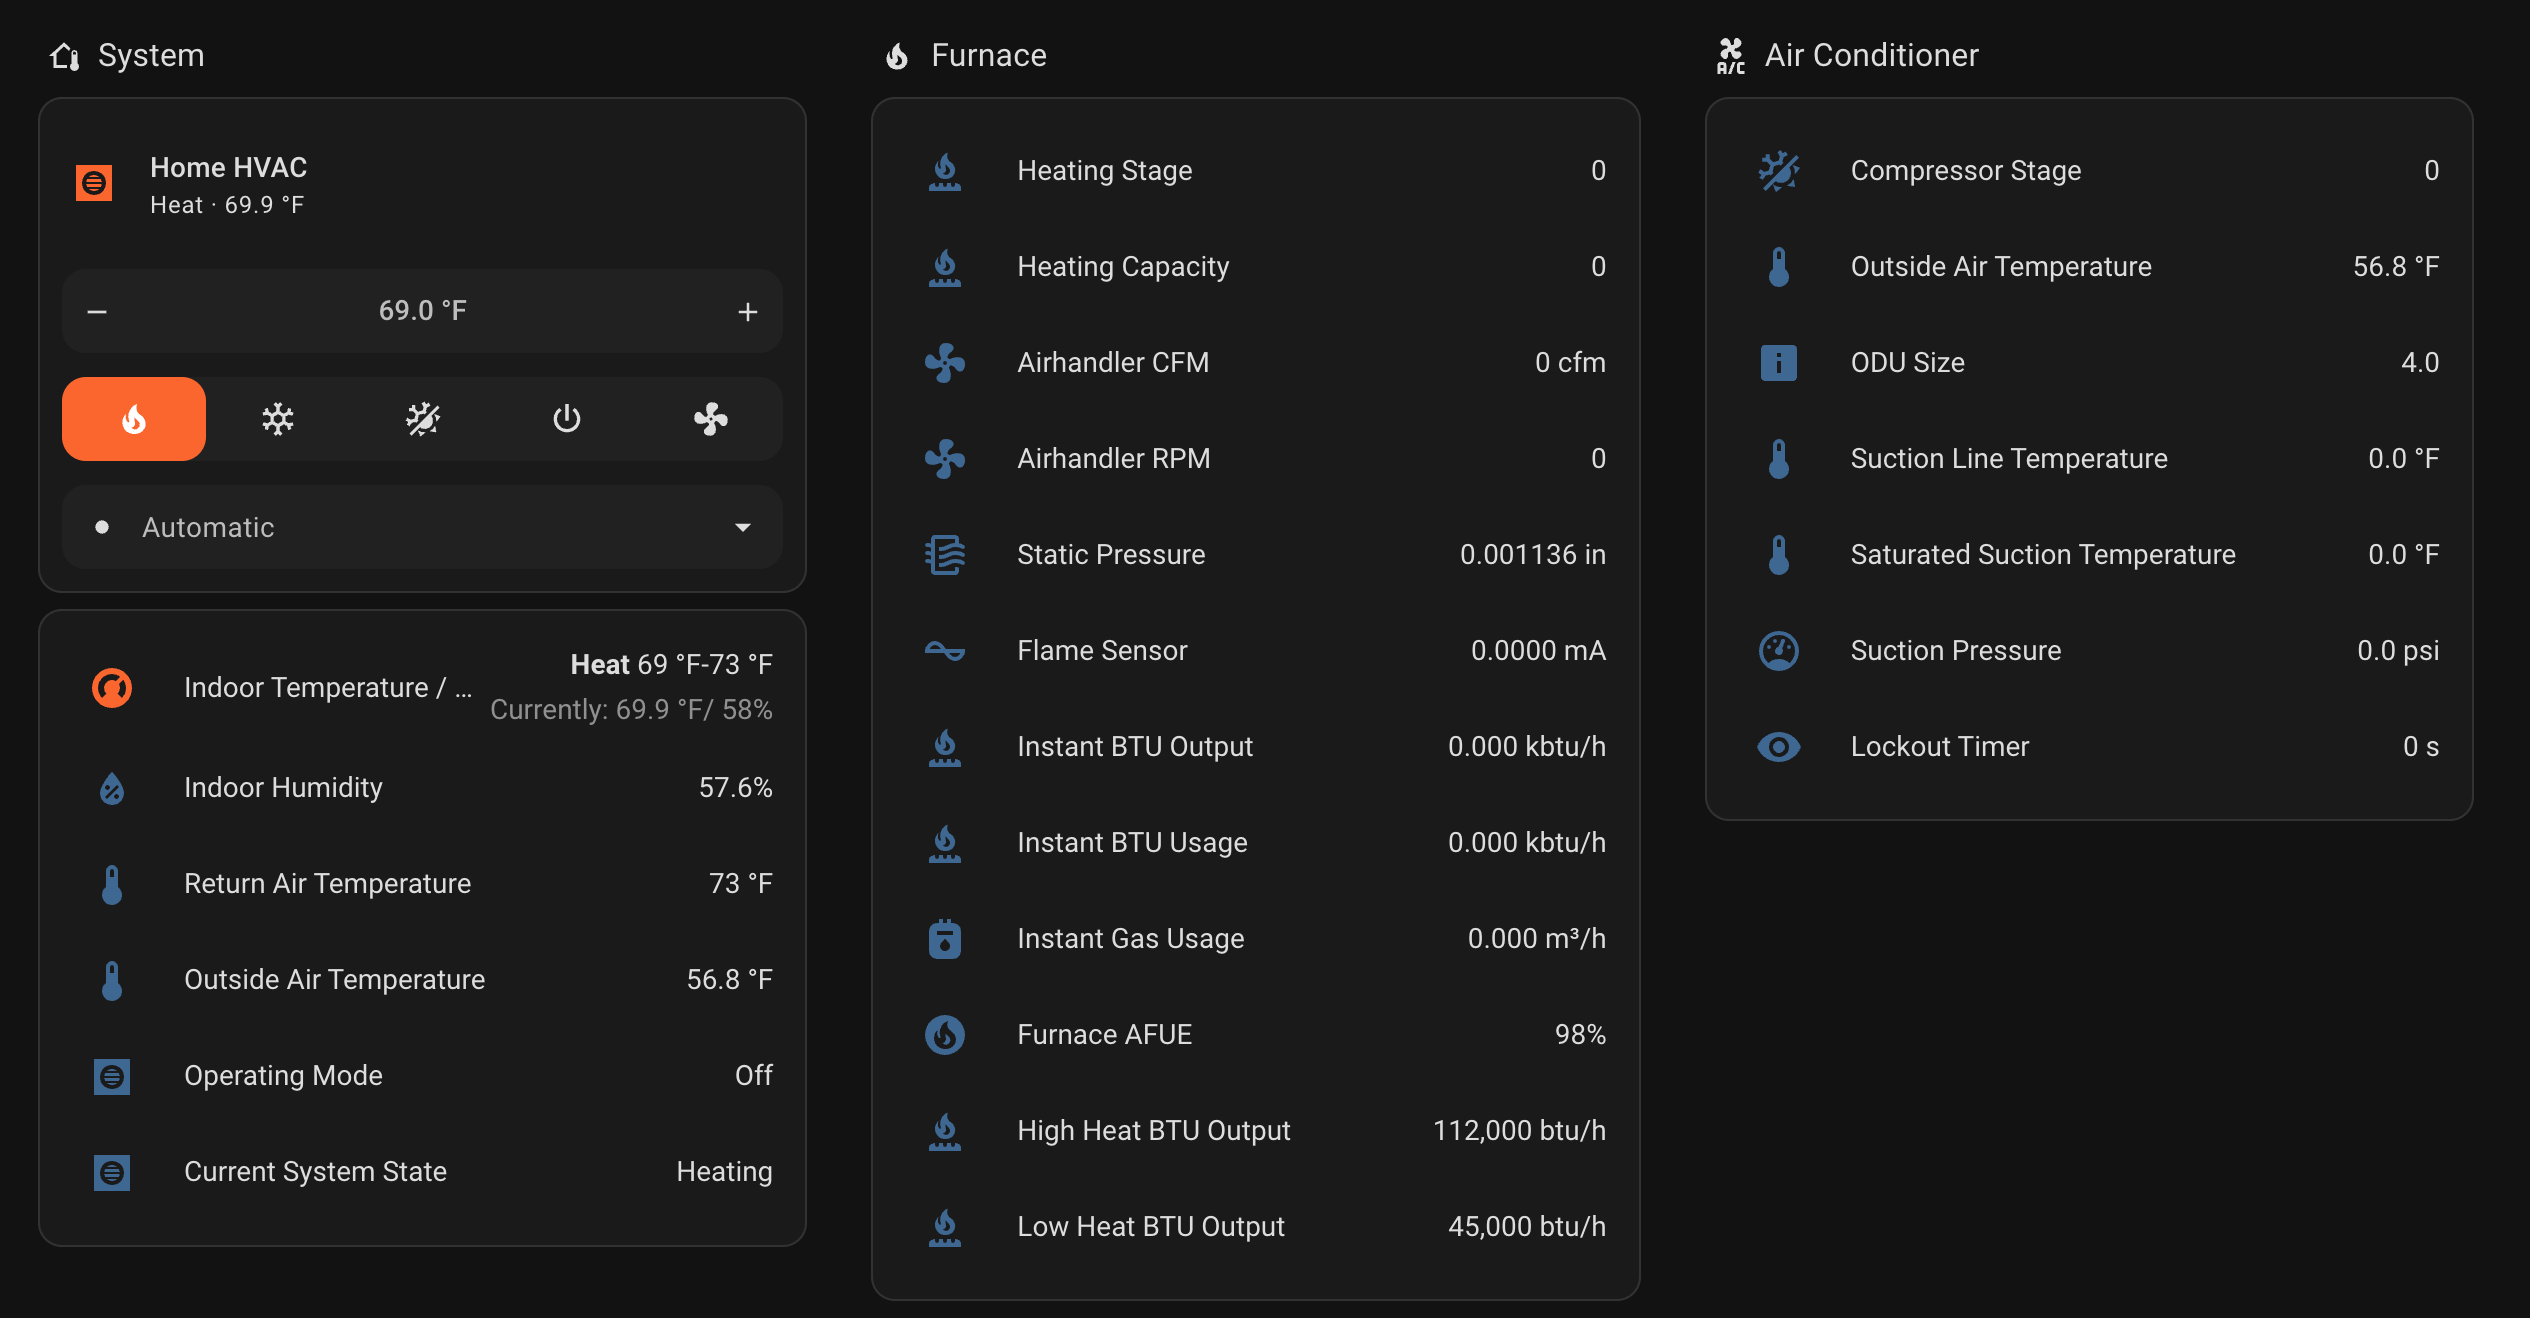
Home Assistant now receives indoor conditions, operating state, furnace modulation, airflow, blower RPM, static pressure, flame current, compressor stage, outside temperature, equipment details, runtime statistics, and EcoNet alerts. The EcoNet thermostat stays in place as the communicating controller required by the equipment, while ESPHome-EcoNet provides the dependable local interface that Rheem's software did not.
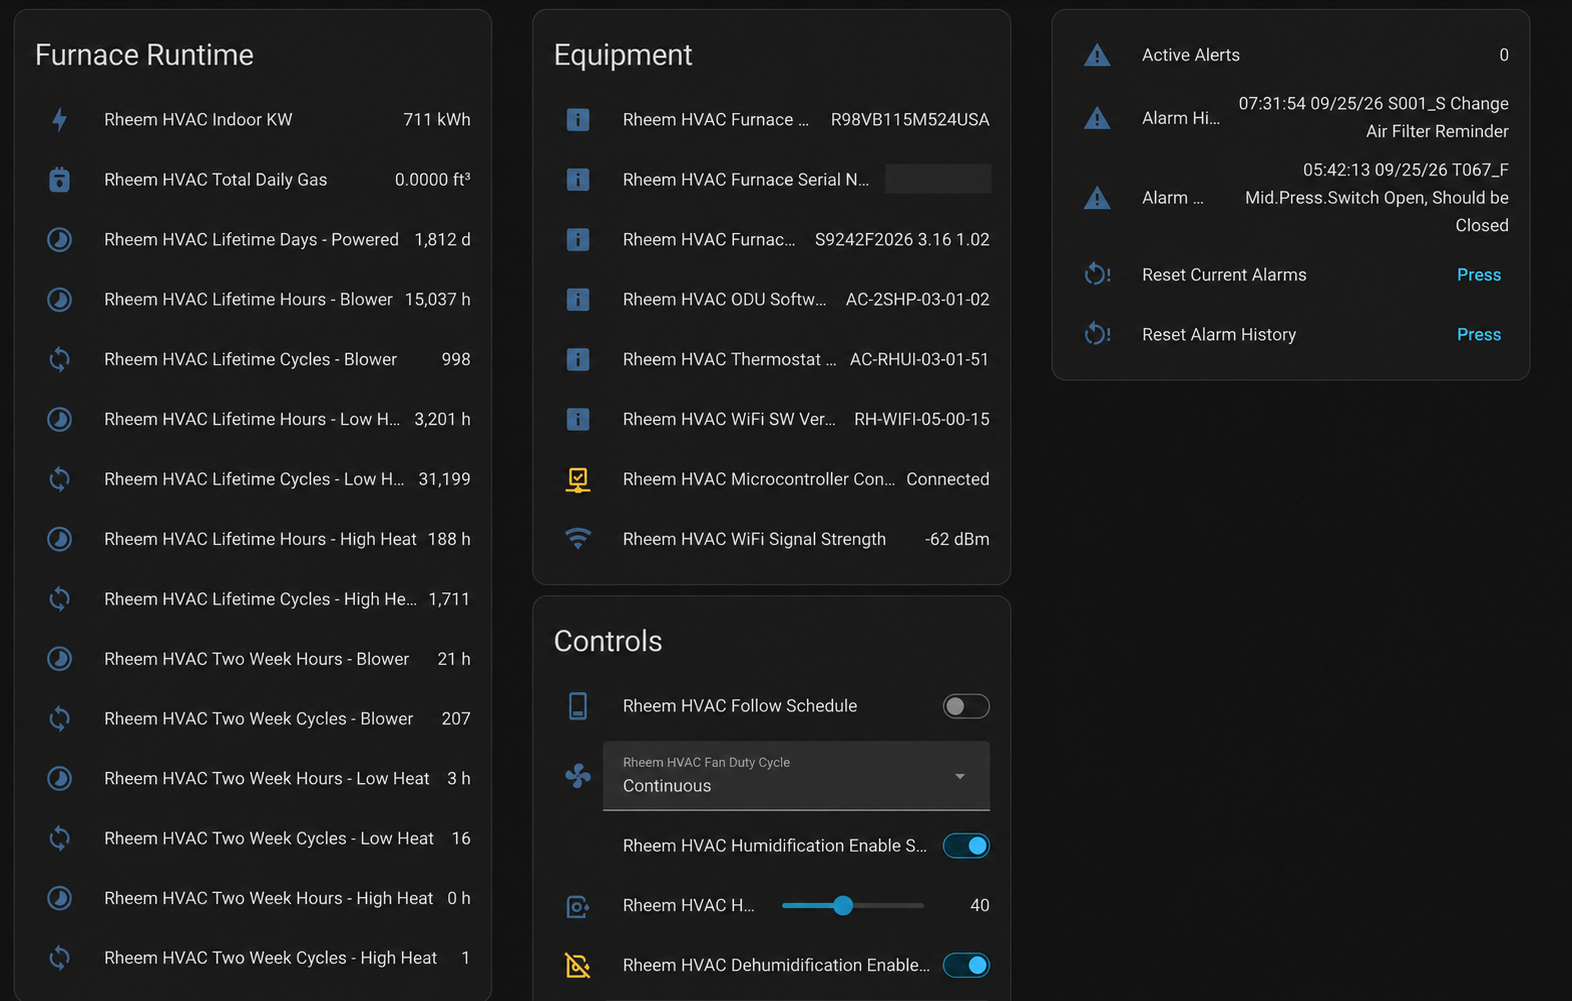
One useful detail is the difference between active alerts and alarm history. The screenshot shows zero active alerts while older events remain in history. I use the active-alert count for current warnings and keep historical records in diagnostics.